How to Use Zapier ChatGPT Plugin: A Step-by-Step Guide


The Zapier ChatGPT Plugin serves as a robust conduit between your ChatGPT and Zapier accounts, opening up a vast landscape of automation possibilities. This powerful synergy allows for a streamlined interaction with over 5,000 apps supported by Zapier, all from the intuitive interface of ChatGPT.
As you gear up to dive into this automation haven, it’s imperative to have active accounts on both Zapier and ChatGPT Plus. Ensuring these prerequisites are in place is the first stride towards embarking on a journey of simplified task management and enhanced productivity.
Connecting ChatGPT to Zapier
The process begins with linking your ChatGPT to Zapier. This connection is the gateway to a multitude of functionalities that will streamline your workflow.
Navigate to your ChatGPT account and log in.
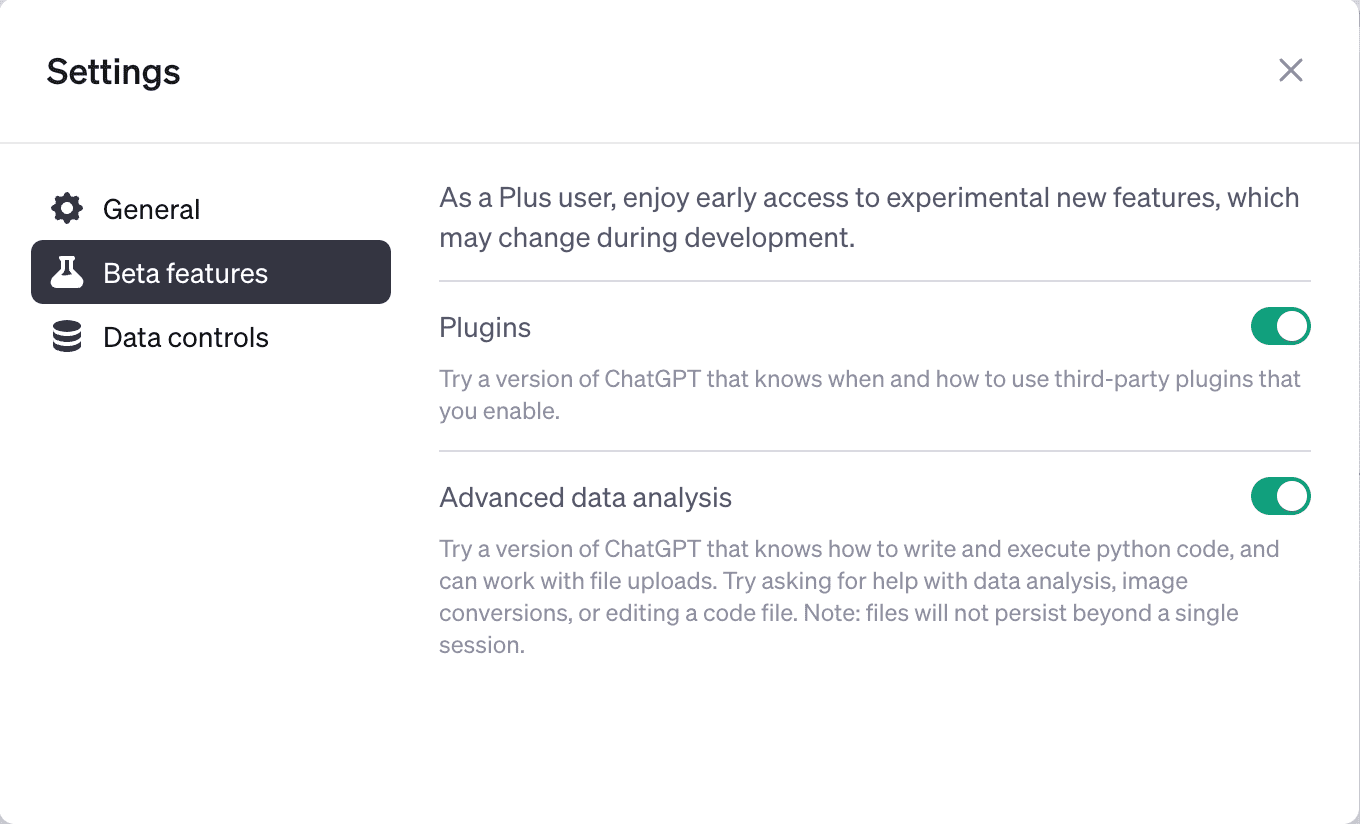
Click on your profile name, then on “Settings.”
Access the “Beta features” tab and toggle on “Plugins.”
Close the dialog box.
Installing the Zapier ChatGPT Plugin
The installation of the Zapier ChatGPT plugin is a pivotal step, acting as the link between ChatGPT and Zapier.
Hover over the GPT-4 model within a chat window and click “Plugins.”
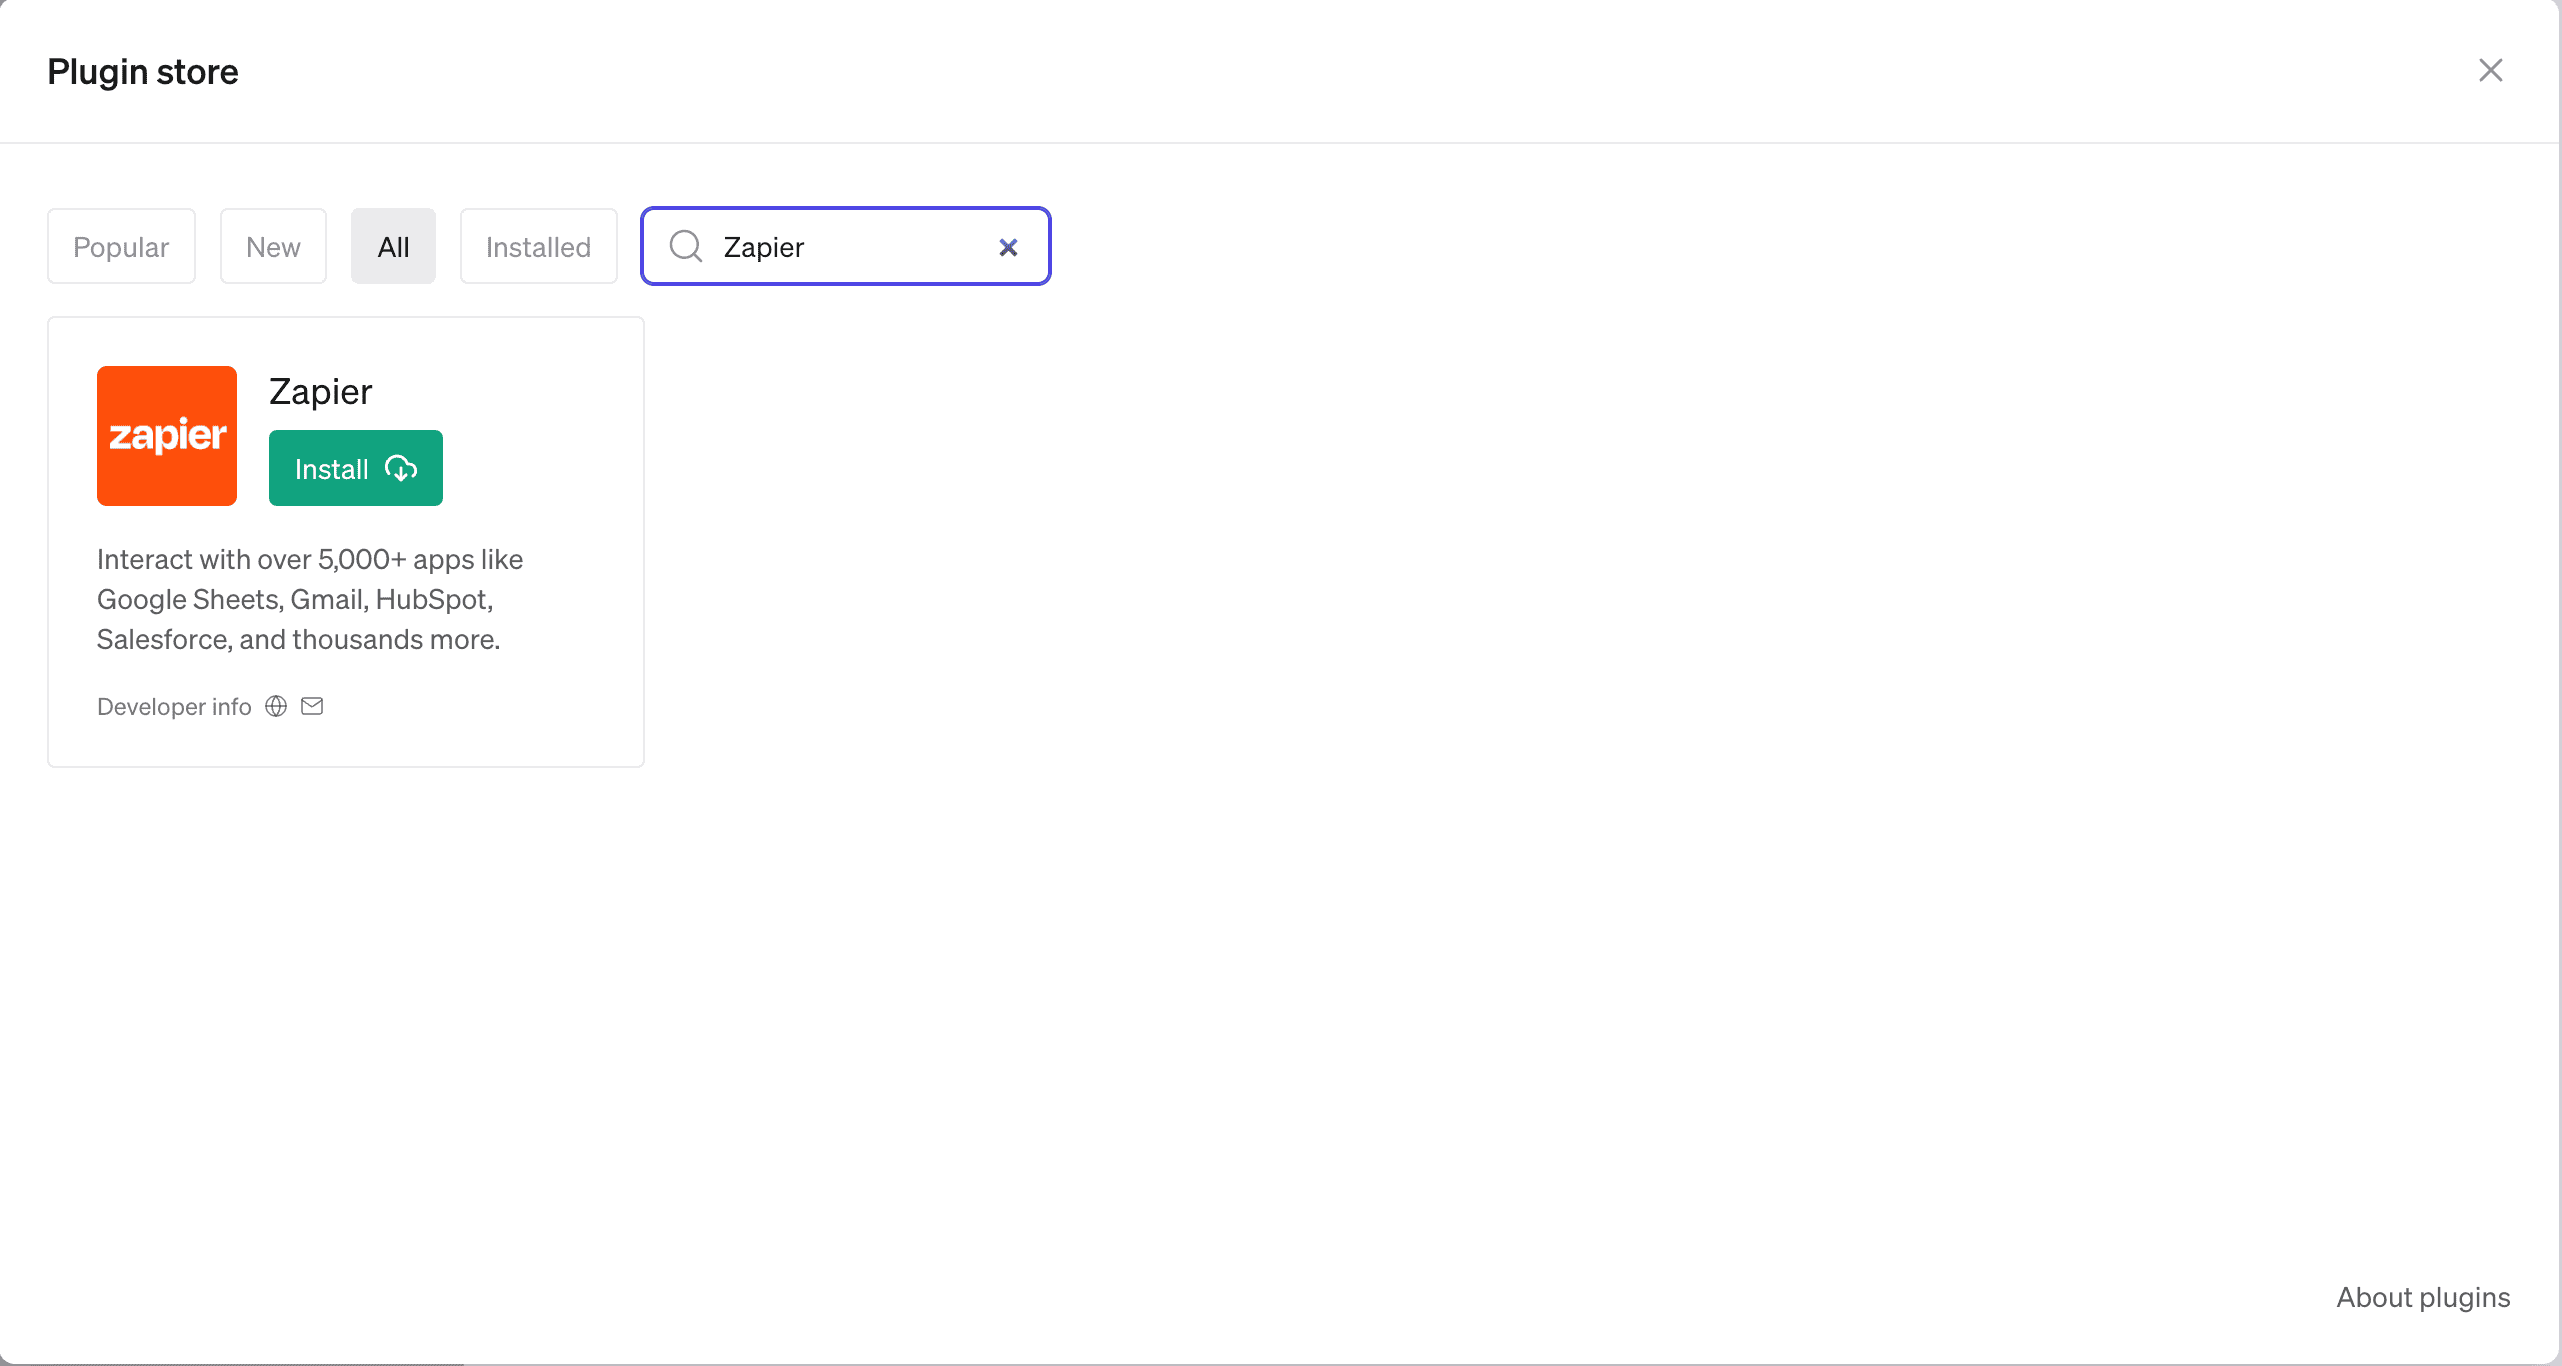
Select “Plugin store” from the dropdown.
Look for “Zapier” using the search box, click “Install,” and follow the prompts to link your Zapier account.
Setting Up ChatGPT AI Actions
AI actions are specialized actions within Zapier designed for AI applications, enabling them to perform a vast array of tasks across over 30,000 searches and actions supported on the platform, via the Natural Language Actions API. They operate independently from the conventional actions within your Zapier account, providing a bridge for AI apps to execute tasks on your behalf in a more intuitive and seamless manner.
Go to the saved ChatGPT actions page in your Zapier account.
Click “Add a new action.”
Search and select the desired app or action, and choose a connection.
Fill out any necessary fields and click “Enable action.”
Using Zapier Actions with ChatGPT
With the setup complete, you can now dive into utilizing Zapier actions.
Initiate a new chat by clicking “+ New chat” on the left sidebar.
Choose the GPT-4 model and select “Plugins” from the dropdown, ensuring the Zapier ChatGPT plugin is enabled.
You can now perform actions, such as email sending, with the Zapier ChatGPT plugin.
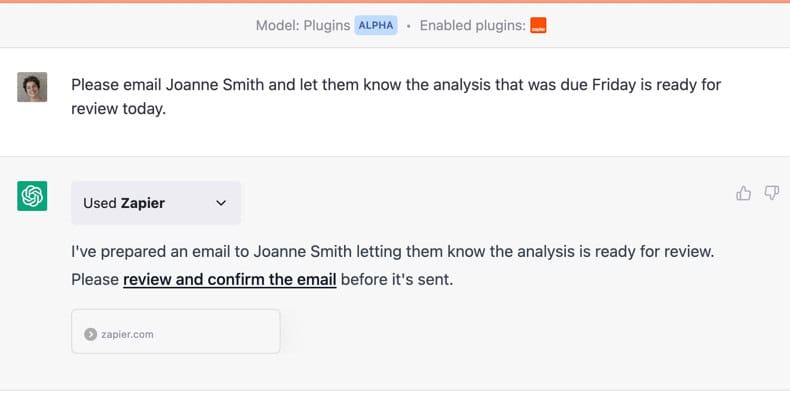
Accuracy is crucial in automation. Reviewing your AI actions ensures that the tasks performed align with your directives, offering a layer of verification before execution.
To do this, you should:
Click the confirmation link within your chat to review the AI action.
Edit fields if necessary, then click “Run” to confirm and execute the action.
As your automation needs evolve with the Zapier ChatGPT plugin, managing your AI actions becomes essential. This means you should edit or delete actions when necessary, keeping your setup refined and up to date:
Navigate to the saved ChatGPT actions page in your Zapier account.
Click on the AI action you wish to edit or delete, make your changes and click “Enable action” or “Delete” accordingly.
Embracing Automation Through Zapier ChatGPT Plugin
With the Zapier ChatGPT Plugin, a horizon of automated workflows awaits. Following the outlined steps ensures a seamless setup, enabling you to leverage the power of AI in simplifying complex tasks.
As you advance, reviewing and managing AI actions keeps your automation endeavors precise and tailored to your needs. The fusion of ChatGPT and Zapier not only augments productivity but opens a vista to innovative ways of accomplishing tasks. Dive in, explore, and elevate your automation game with the Zapier ChatGPT Plugin.